QNAP NAS devices provide robust storage for critical business data. Use IDrive® e2 as a secondary repository for your QNAP HBS 3 data or manage your data on IDrive® e2 using the HybridMount cloud gateway. Create Access Keys from the IDrive® e2 account and use them to create a new connection in Cyberduck.
Sections in this article:
Connecting to IDrive® e2 with HBS 3
- Go to the QNAP AppCenter. Install and launch the HBS 3 - Hybrid Backup Sync application.
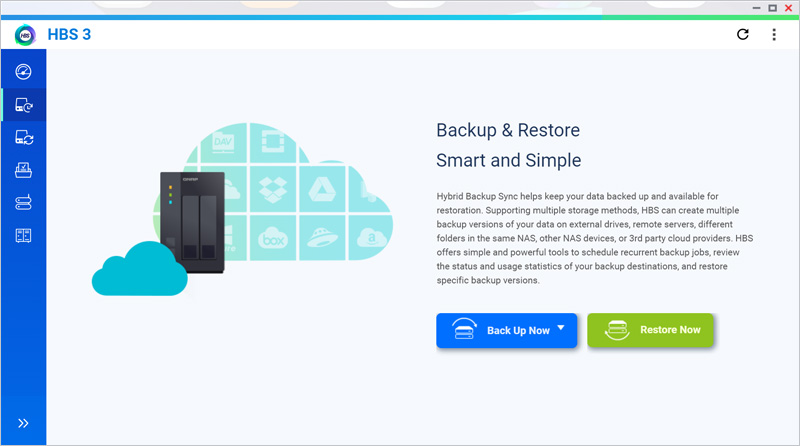
- Click
 in the left-side menu bar, then click Back Up Now.
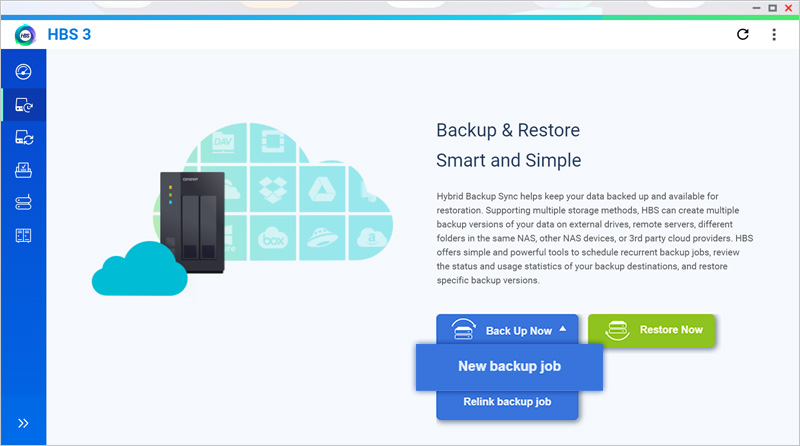
- Click New backup job.
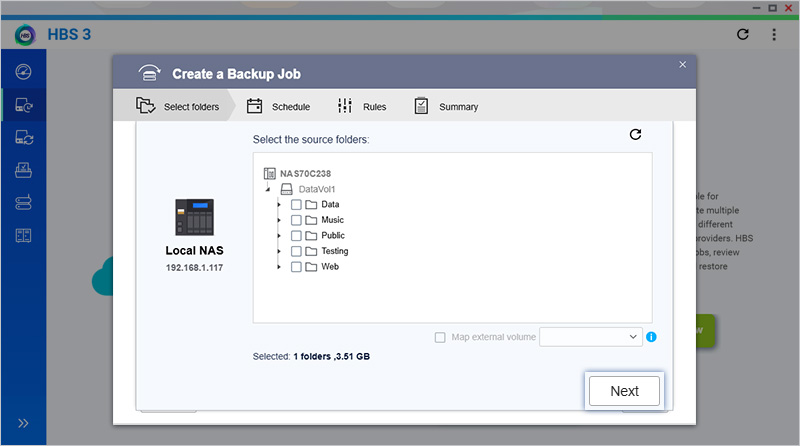
- Select the source folder from QNAP file storage and click Next.
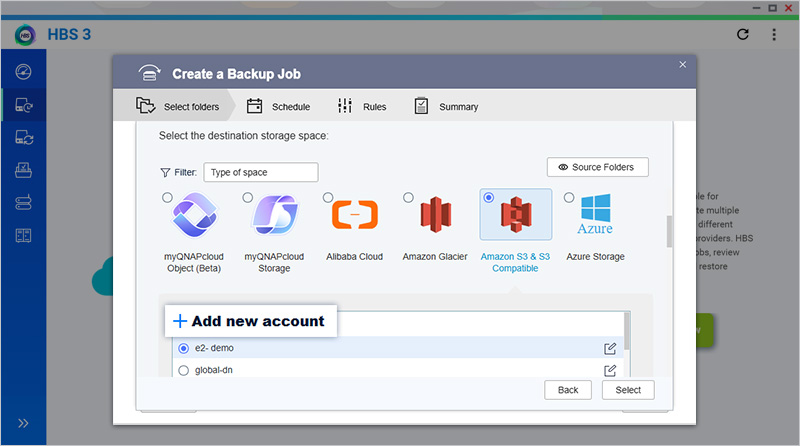
- In the destination storage configuration, click the Amazon S3 & S3 Compatible radio button and click Add New Account.
-
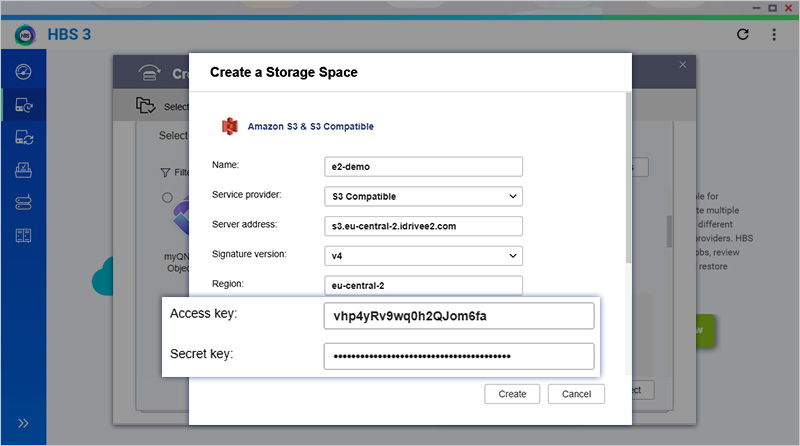
Enter your IDrive® e2 credentials as mentioned below.
- Enter a Name for the destination account.
- Click the dropdown and select S3 Compatible as the Service provider.
- Enter your IDrive® e2 S3 Endpoint as the Server address.
- Click the dropdown and select V4 as the Signature version.
- Enter your IDrive® e2 Region as Region.
- Enter your IDrive® e2 Access Key as Access key.
- Enter your IDrive® e2 Secret Key as Secret key.
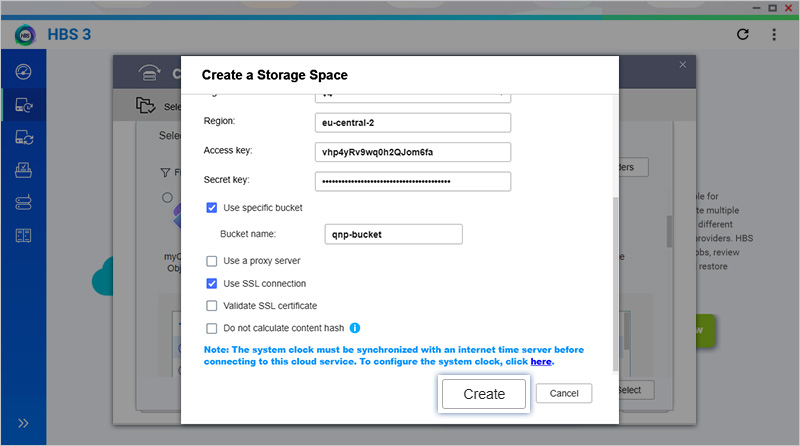
- Select the Use specific bucket checkbox.
- Enter your IDrive® e2 bucket name as Bucket name.
- Select the Use SSL connection checkbox.
- Click Create to add the storage space.
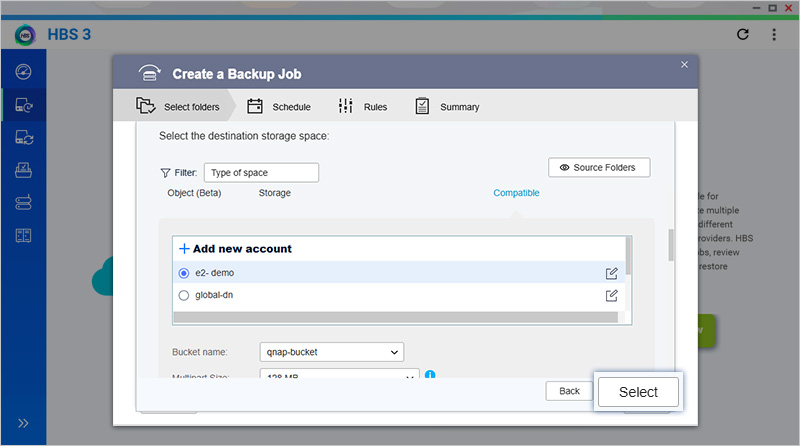
- Select the newly added account from the list and click Select.
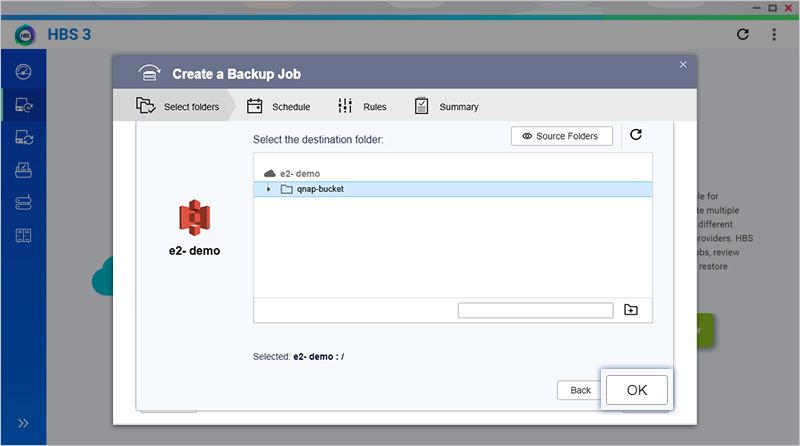
- Select the bucket as the destination folder and click OK.
- Enter a Job Name and click Next.
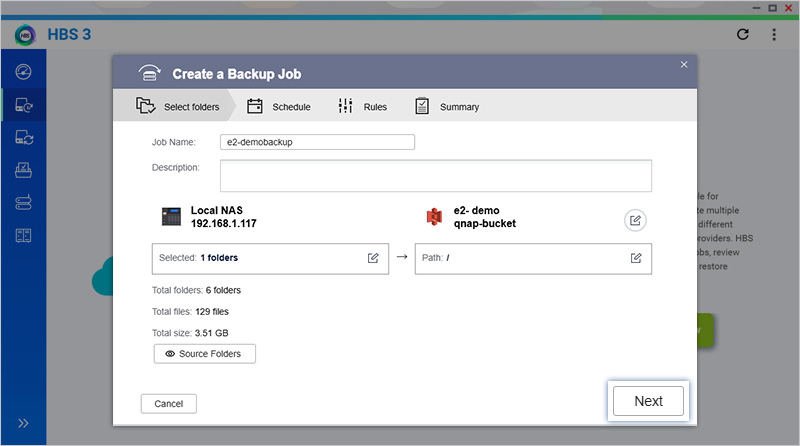
- Set the backup job schedule as required, then click Next.
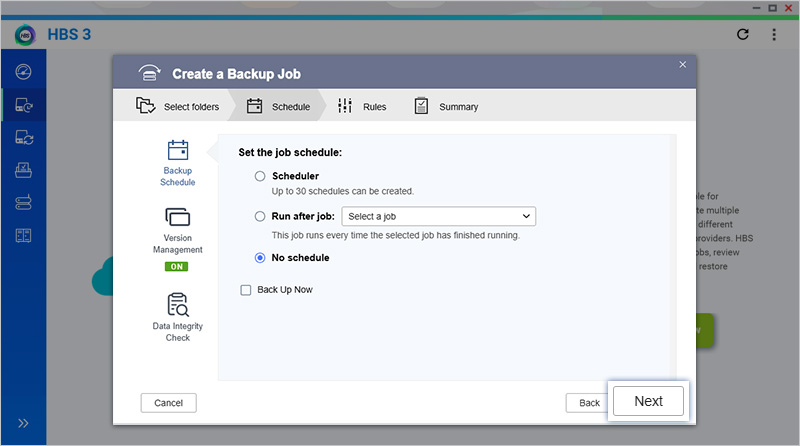
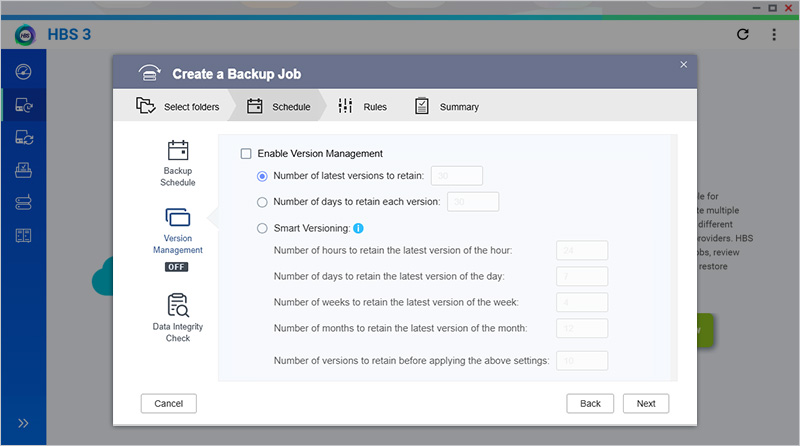
- Select the Enable Version Management checkbox and update settings as required, then click Next.
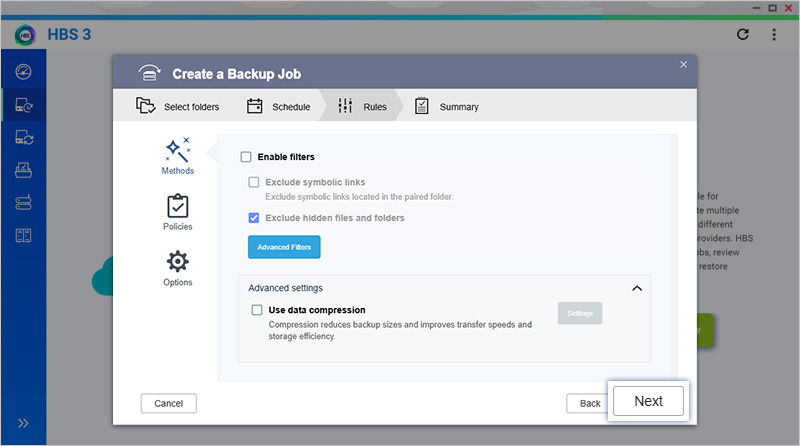
- Select the Enable filters and Exclude hidden files and folders checkbox as required, then click Next.
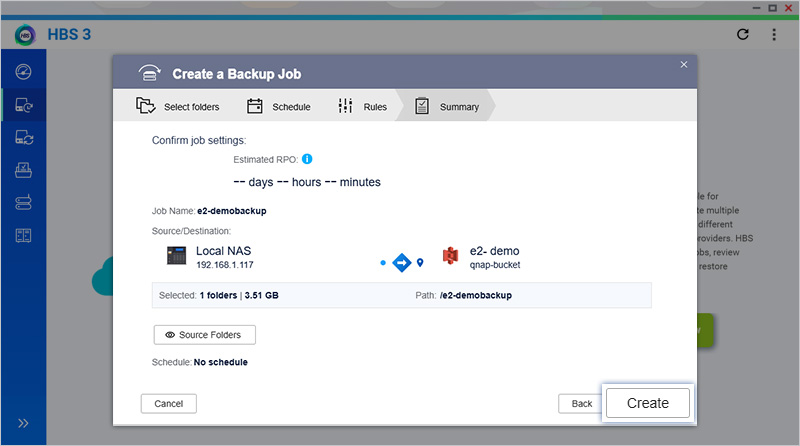
- Verify the backup job summary and click Create.
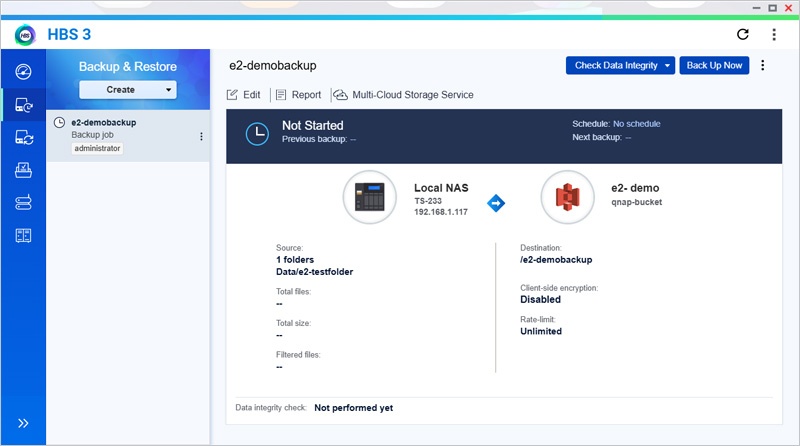
- To start the job, click Back Up Now.
Note: The issue with signature version V4 has been fixed in QNAP HBS-3 26.4.3.647. Please download & install HBS-3 26.4.3.647 or later in NAS apps center: https://download.qnap.com/QPKG/HybridBackup_26.4.3.647_arm_64.zip
Connecting to IDrive® e2 with HybridMount
- Go to QNAP App center and install HybridMount.
- Launch the HybridMount application.
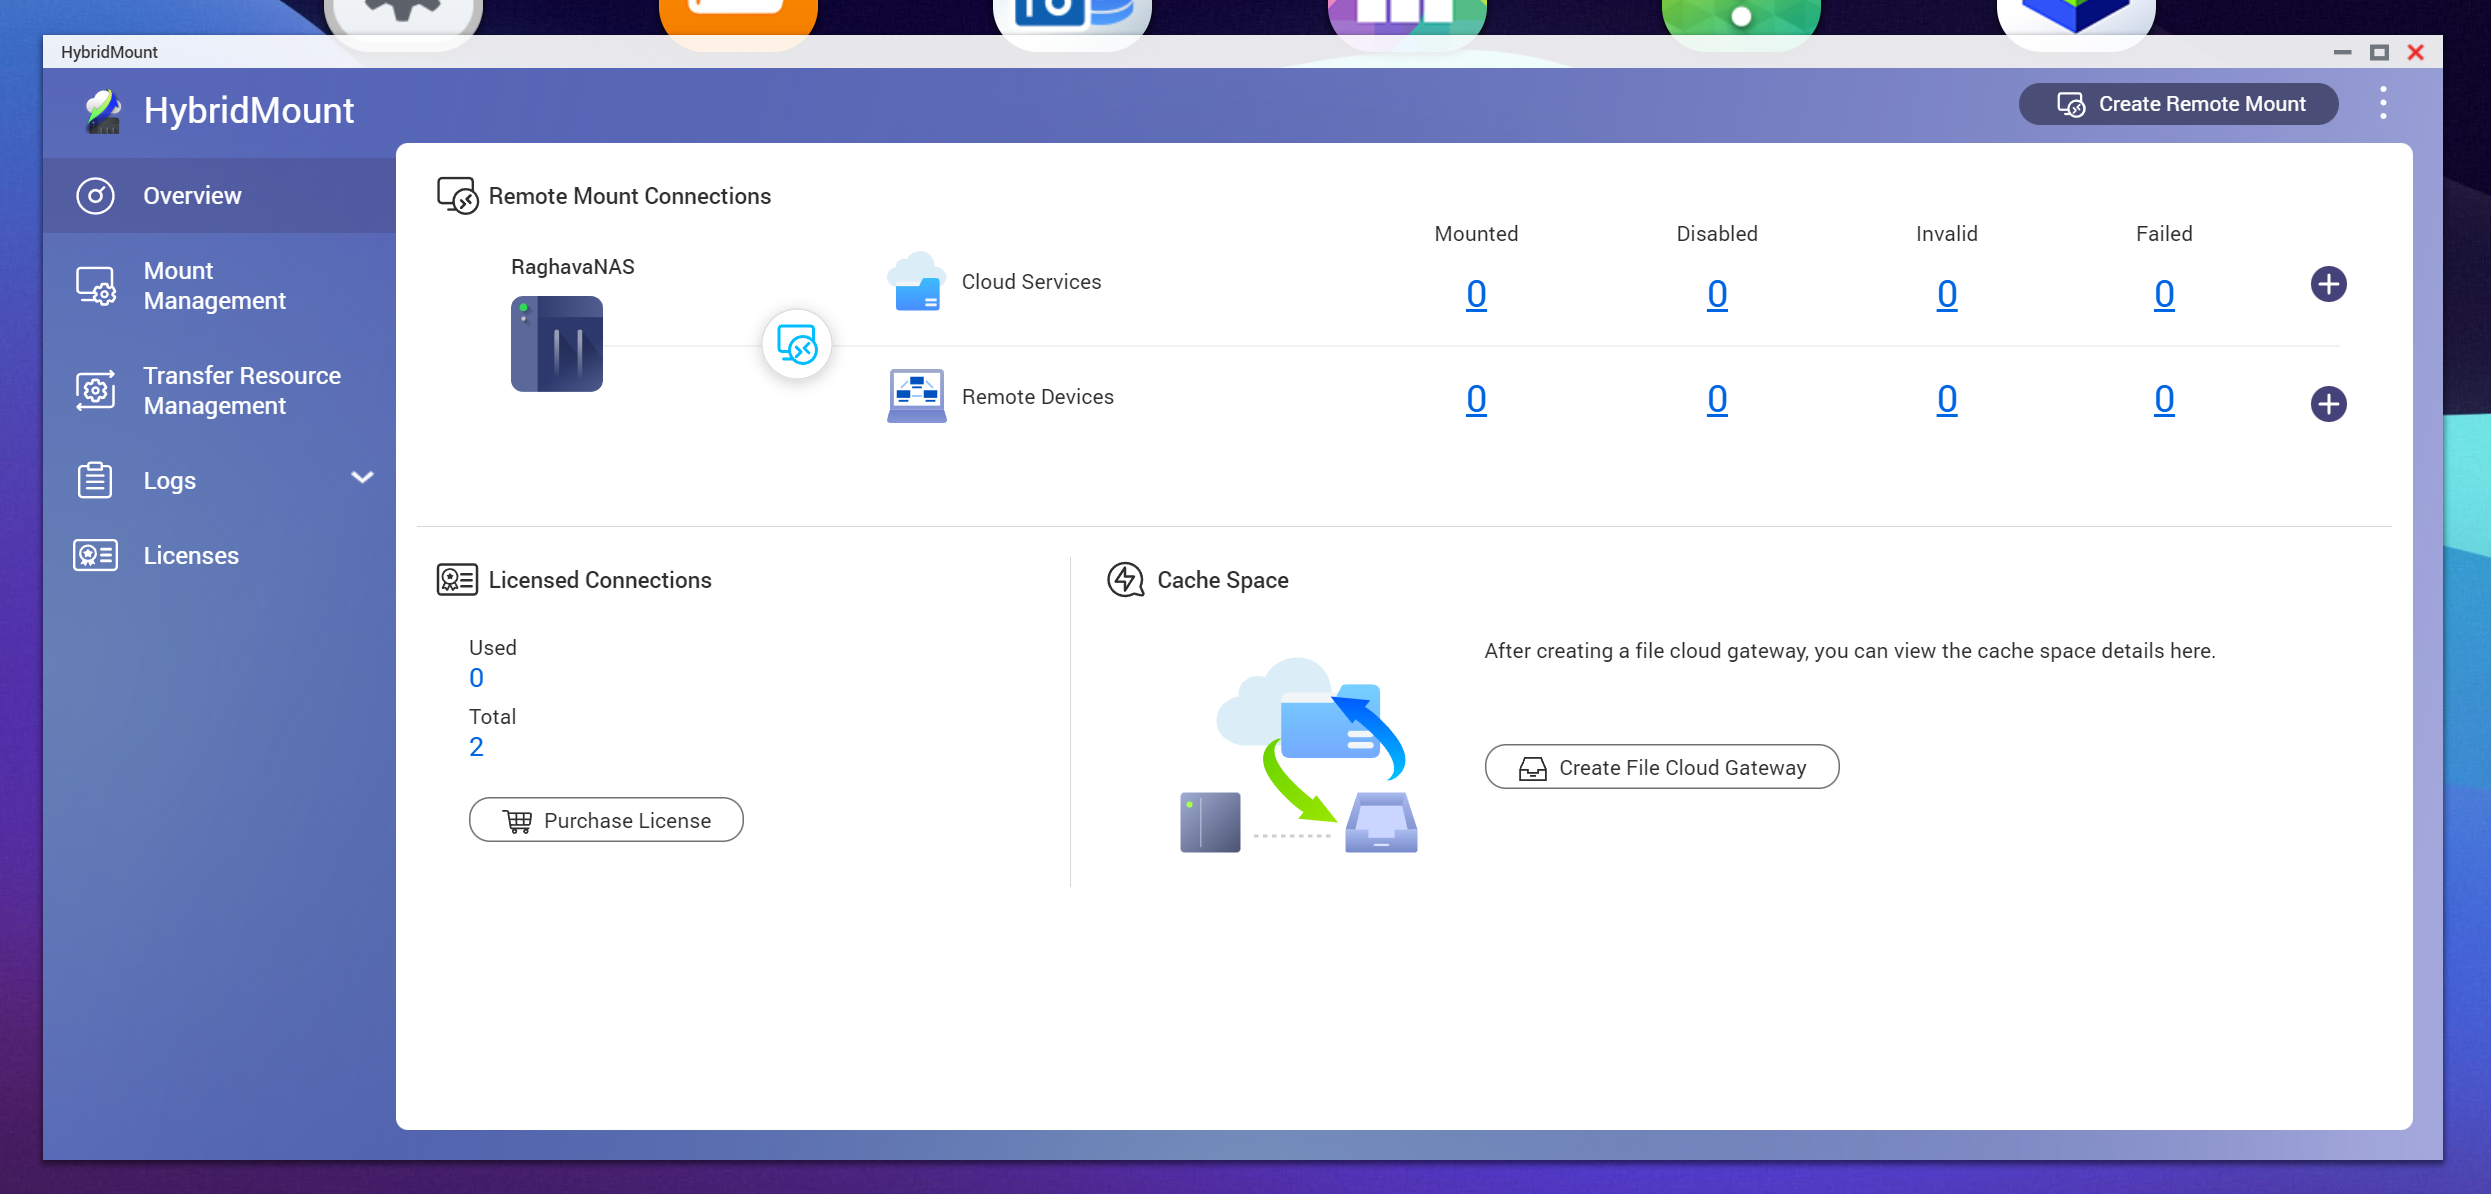
- Click Create Remote Mount and click Create File Cloud Gateway.
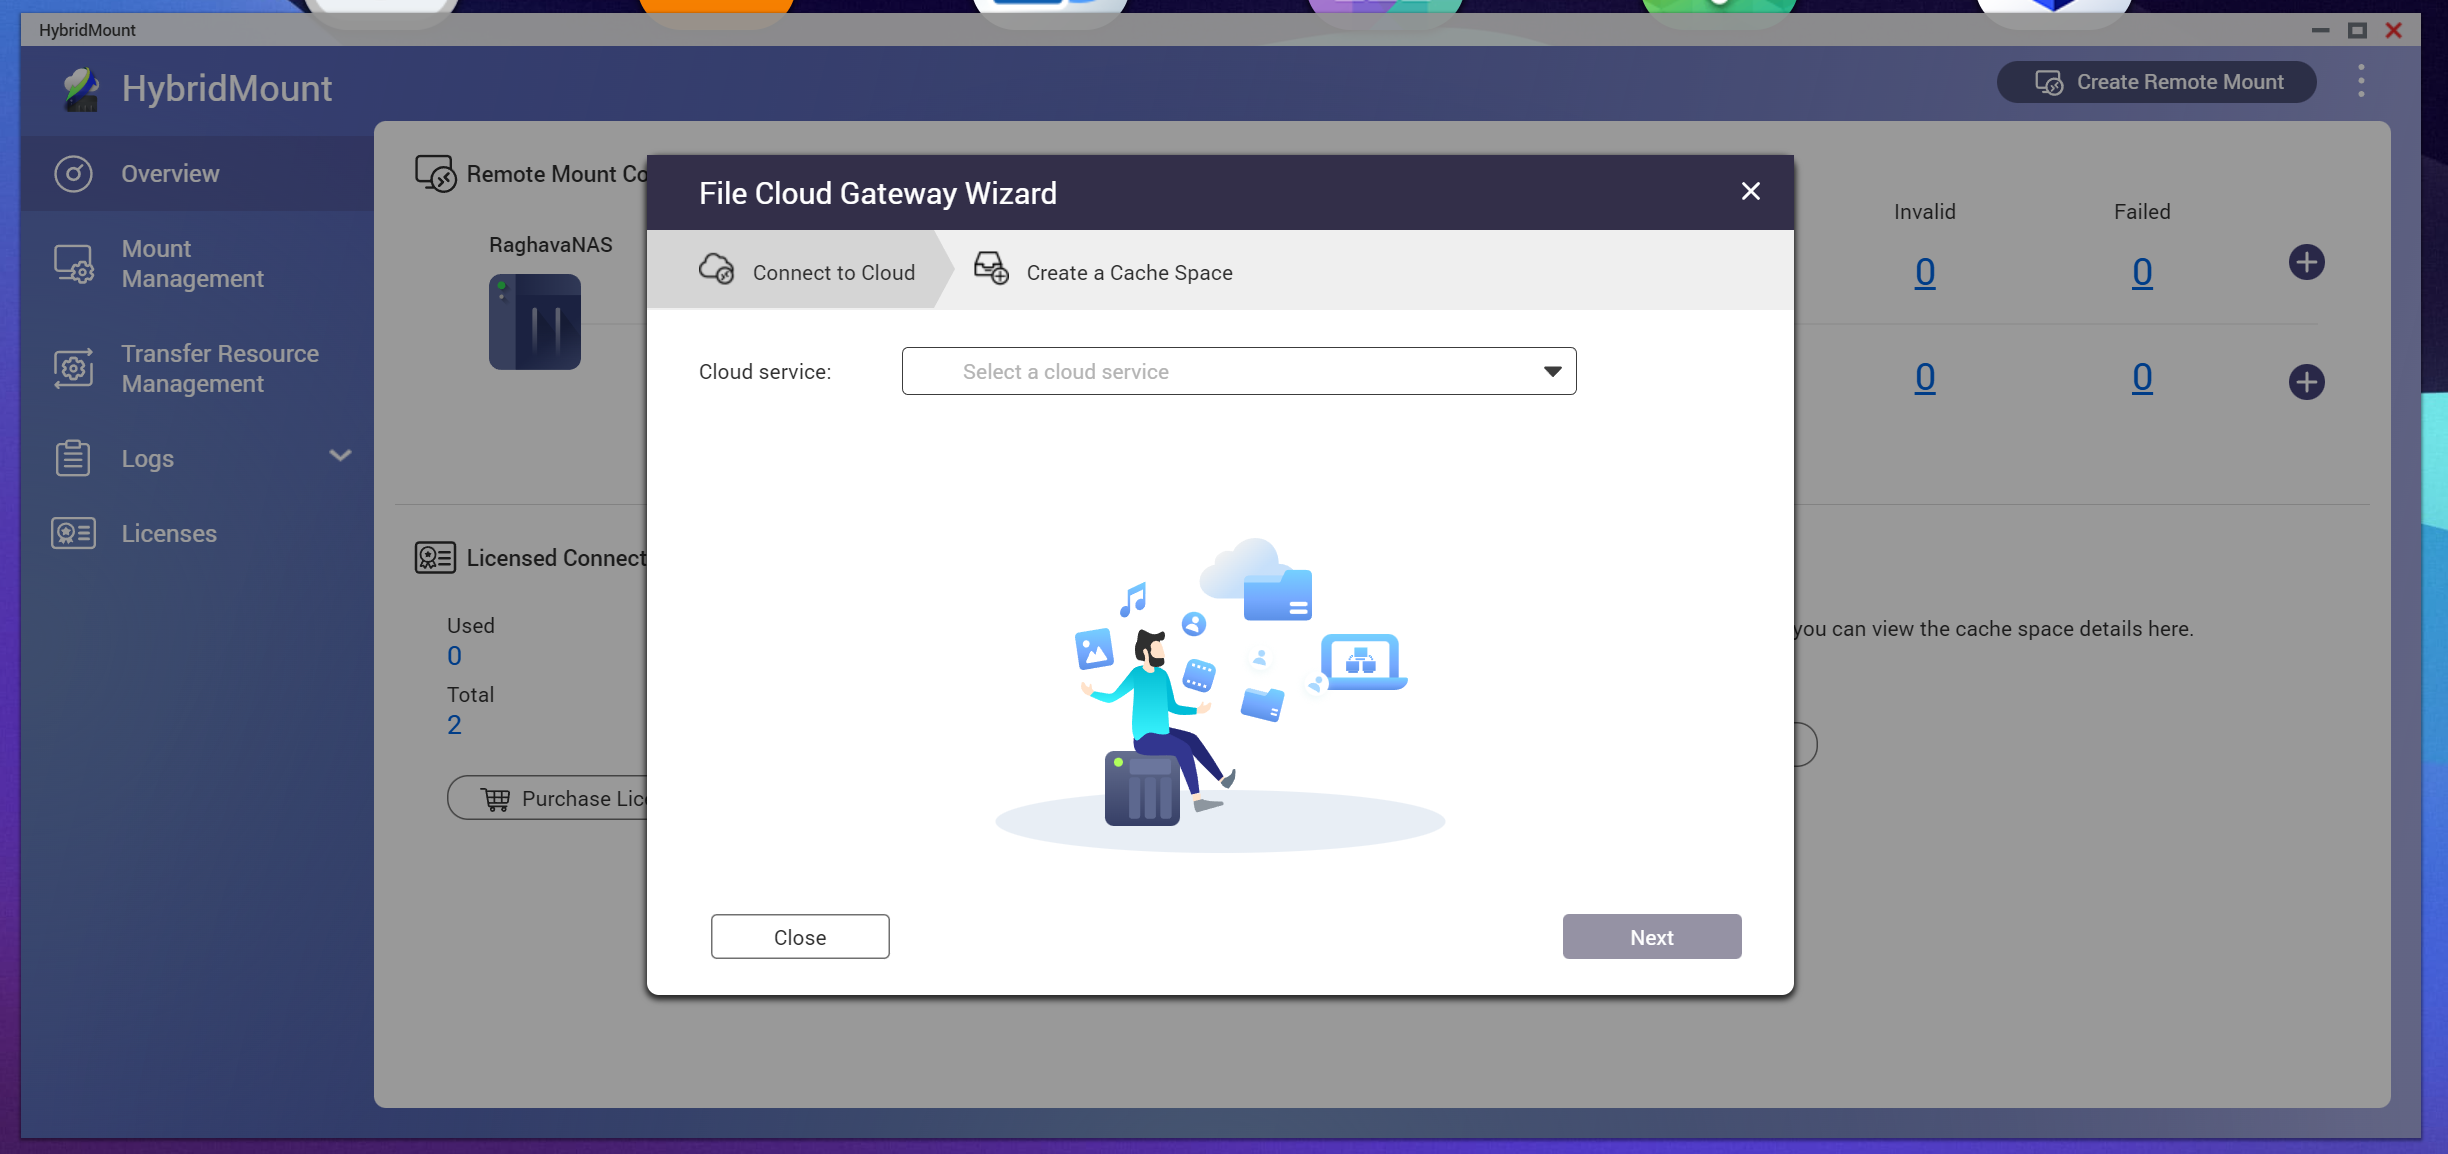
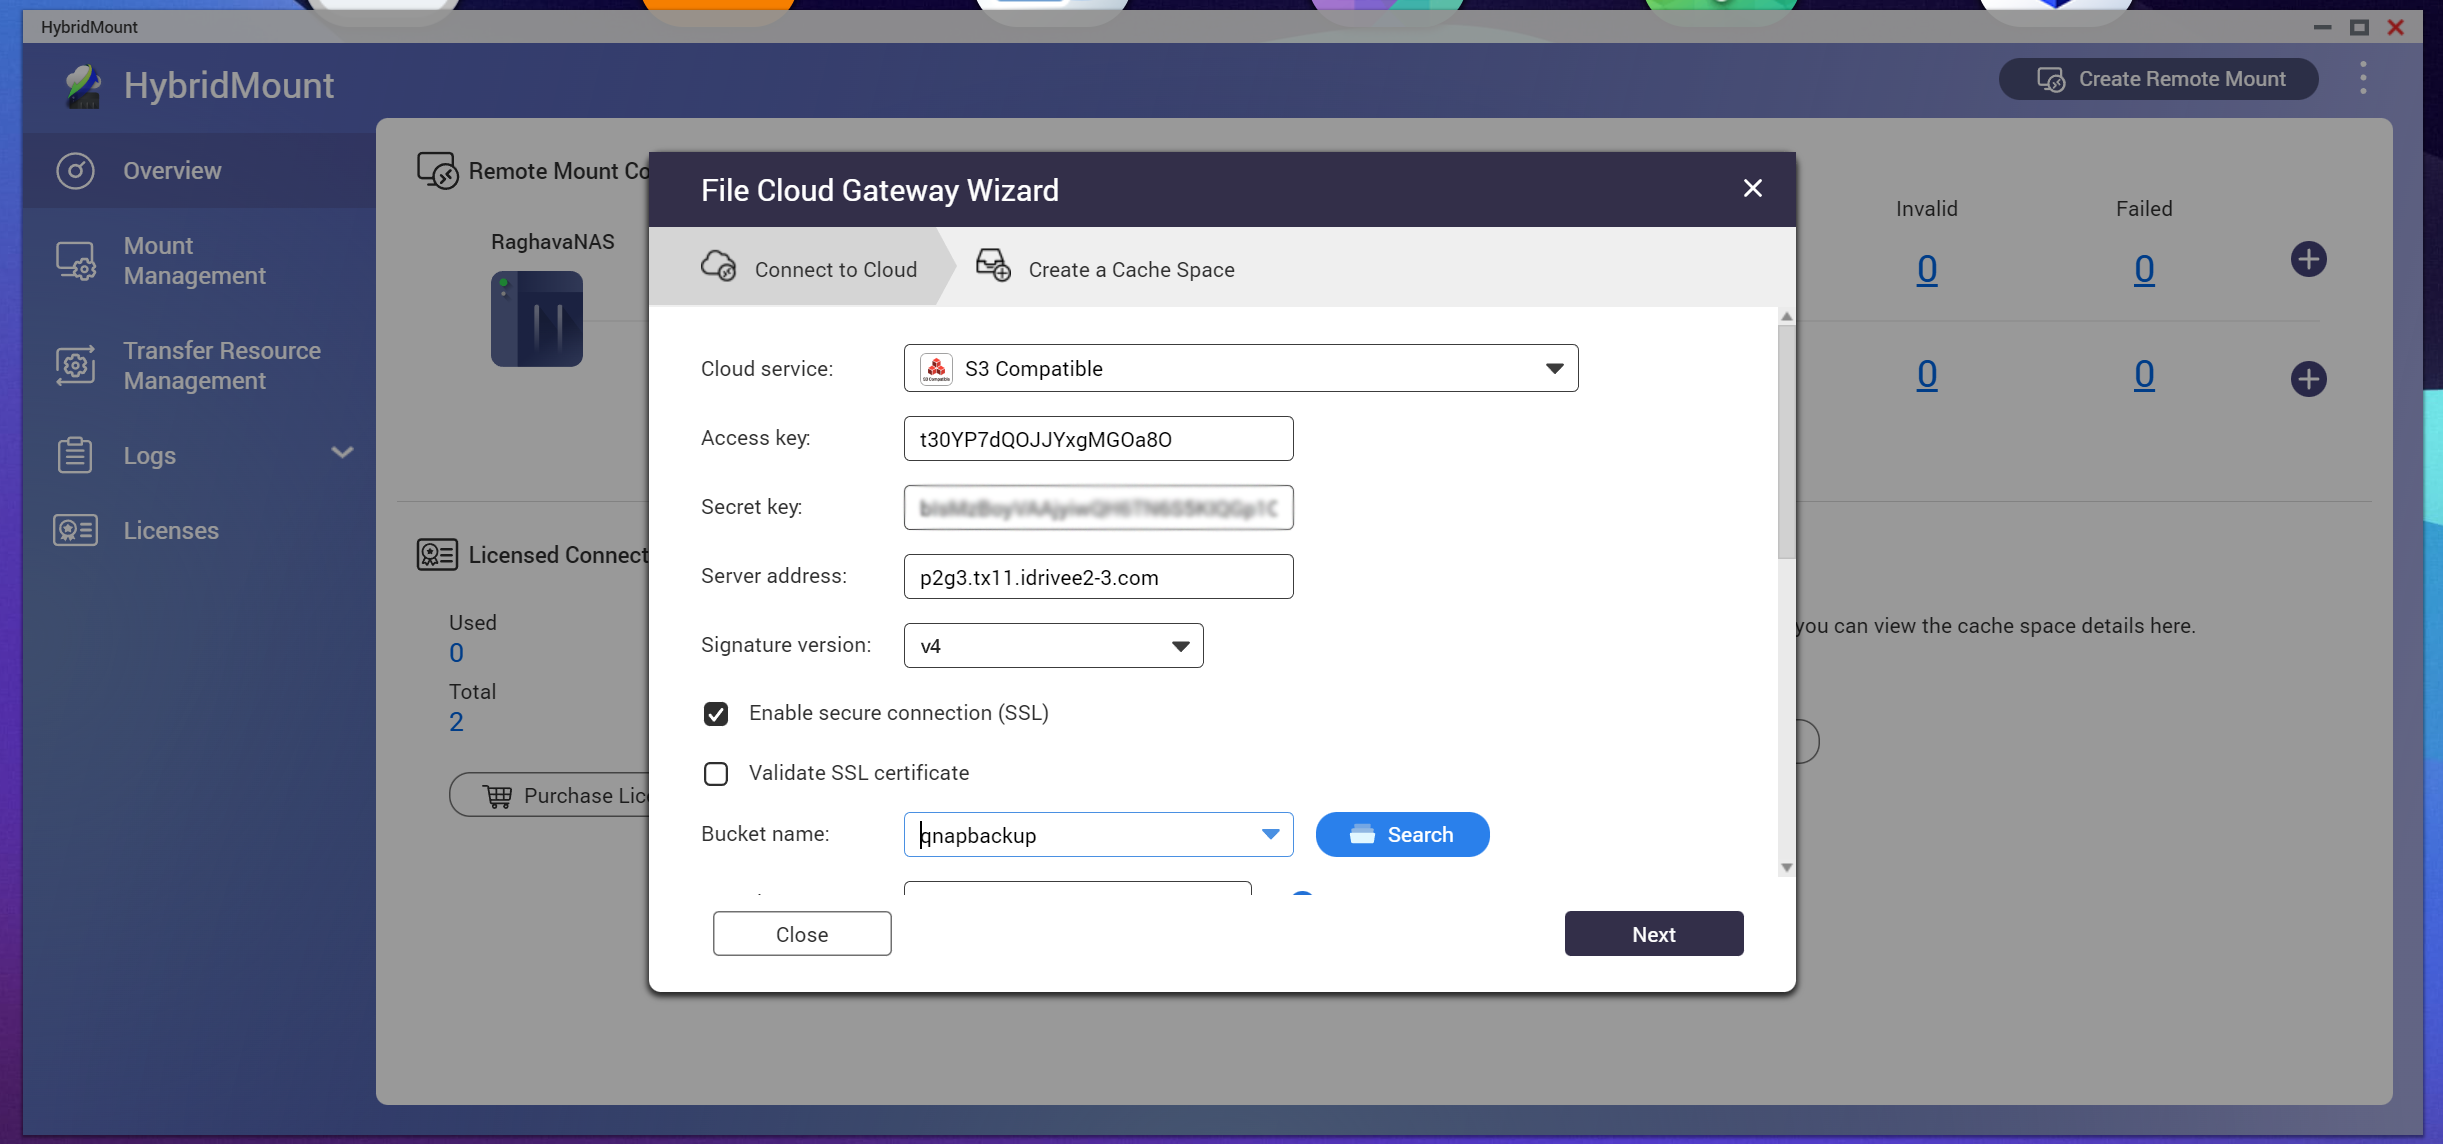
- Select S3 Compatible from Cloud service drop-down, input the access keys and endpoints, then click Next.
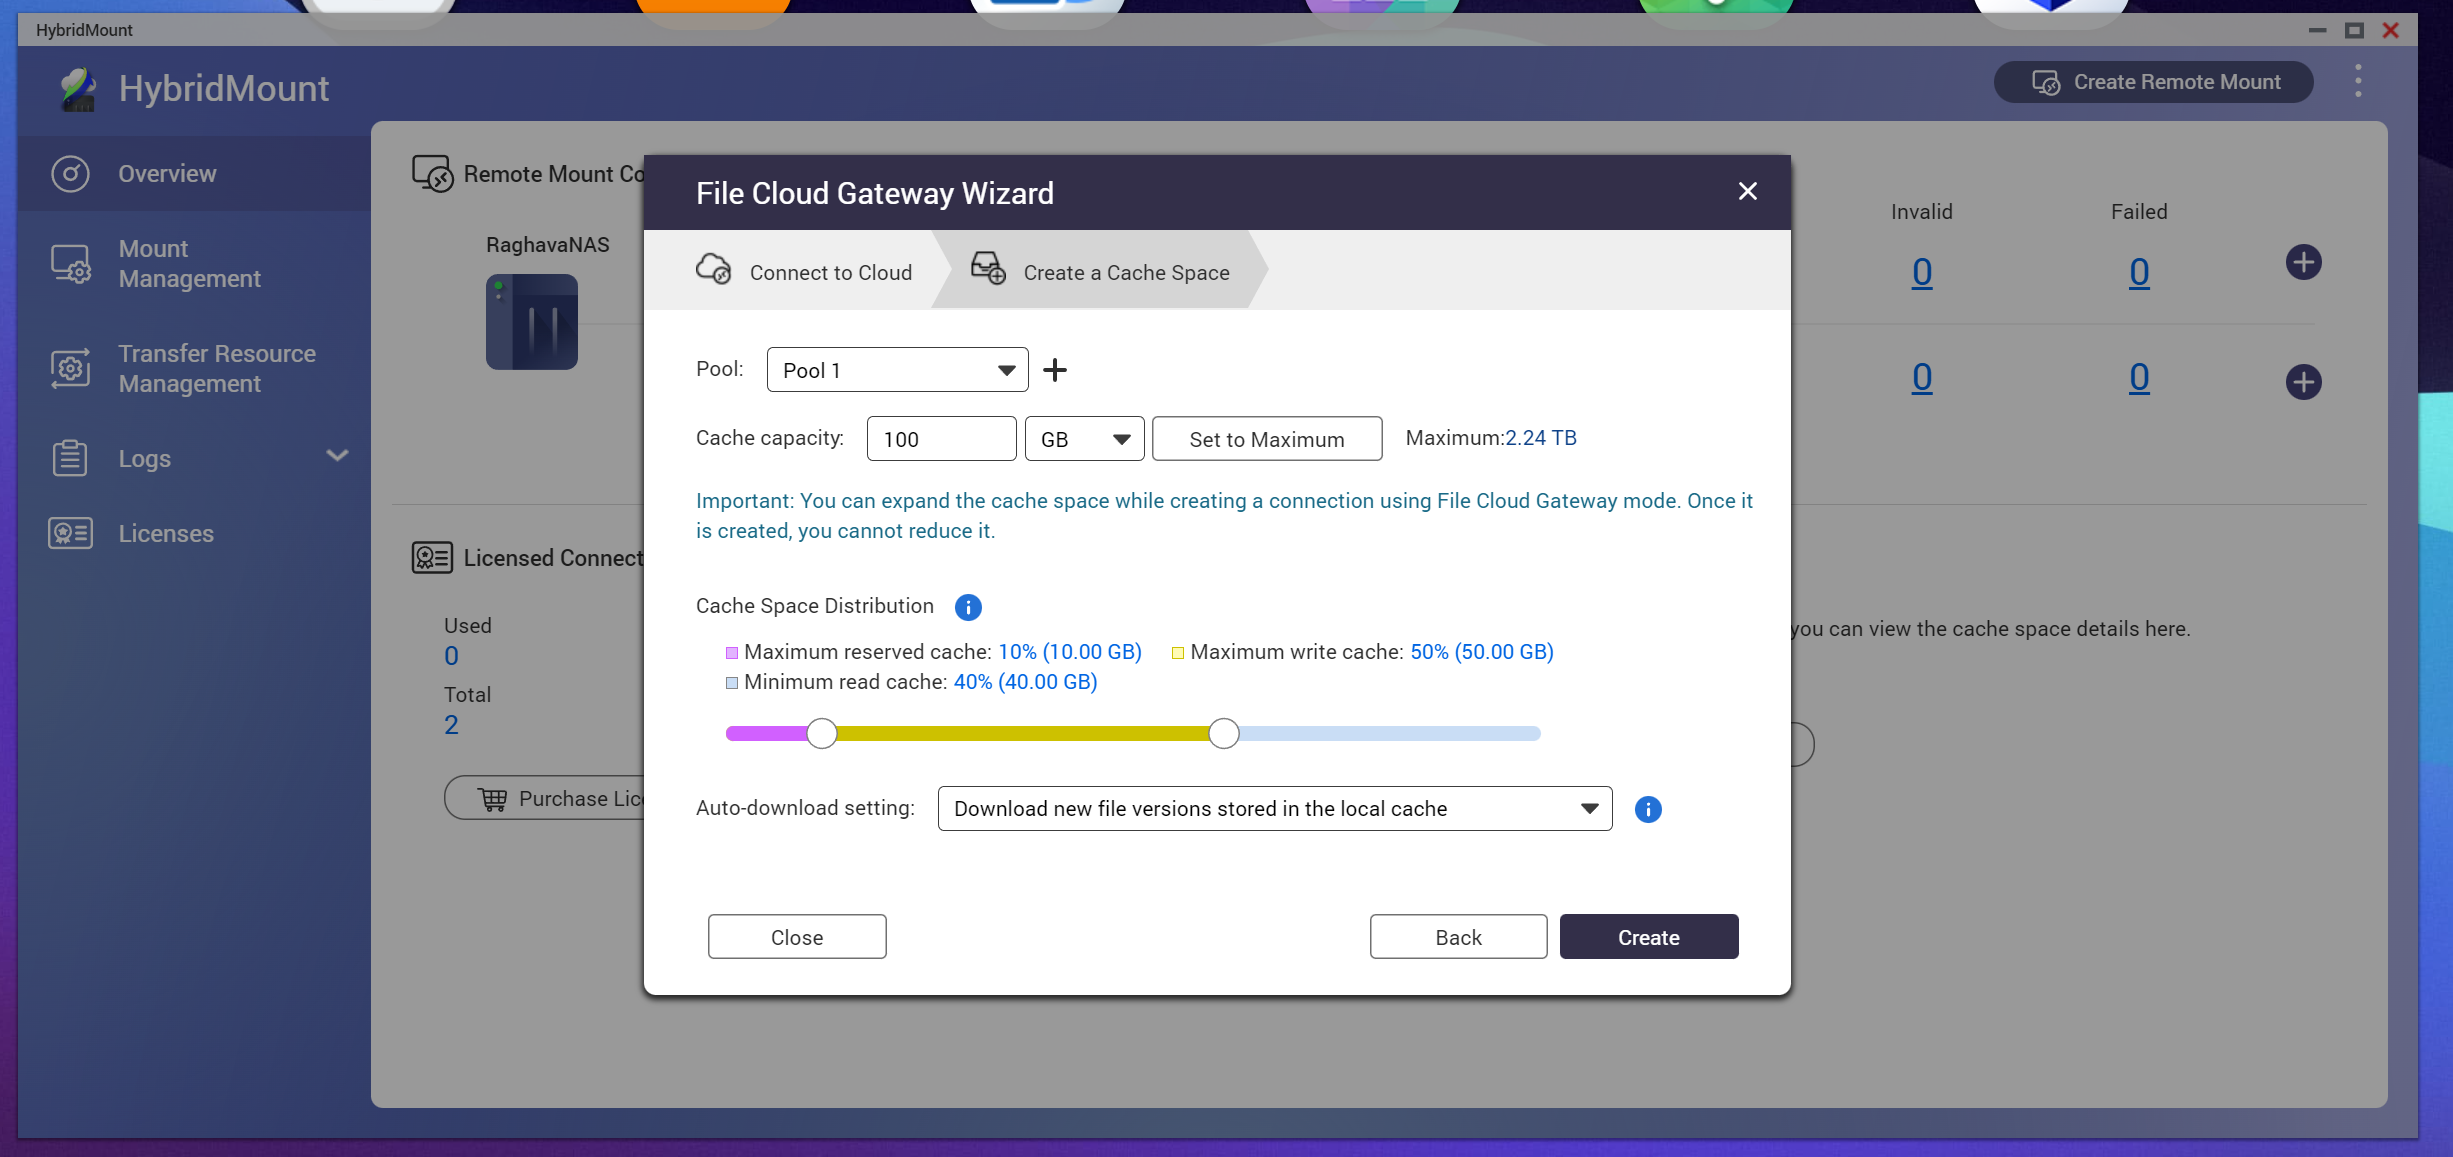
- Create a cache space: Select the pool, specify the volume capacity and click Create.
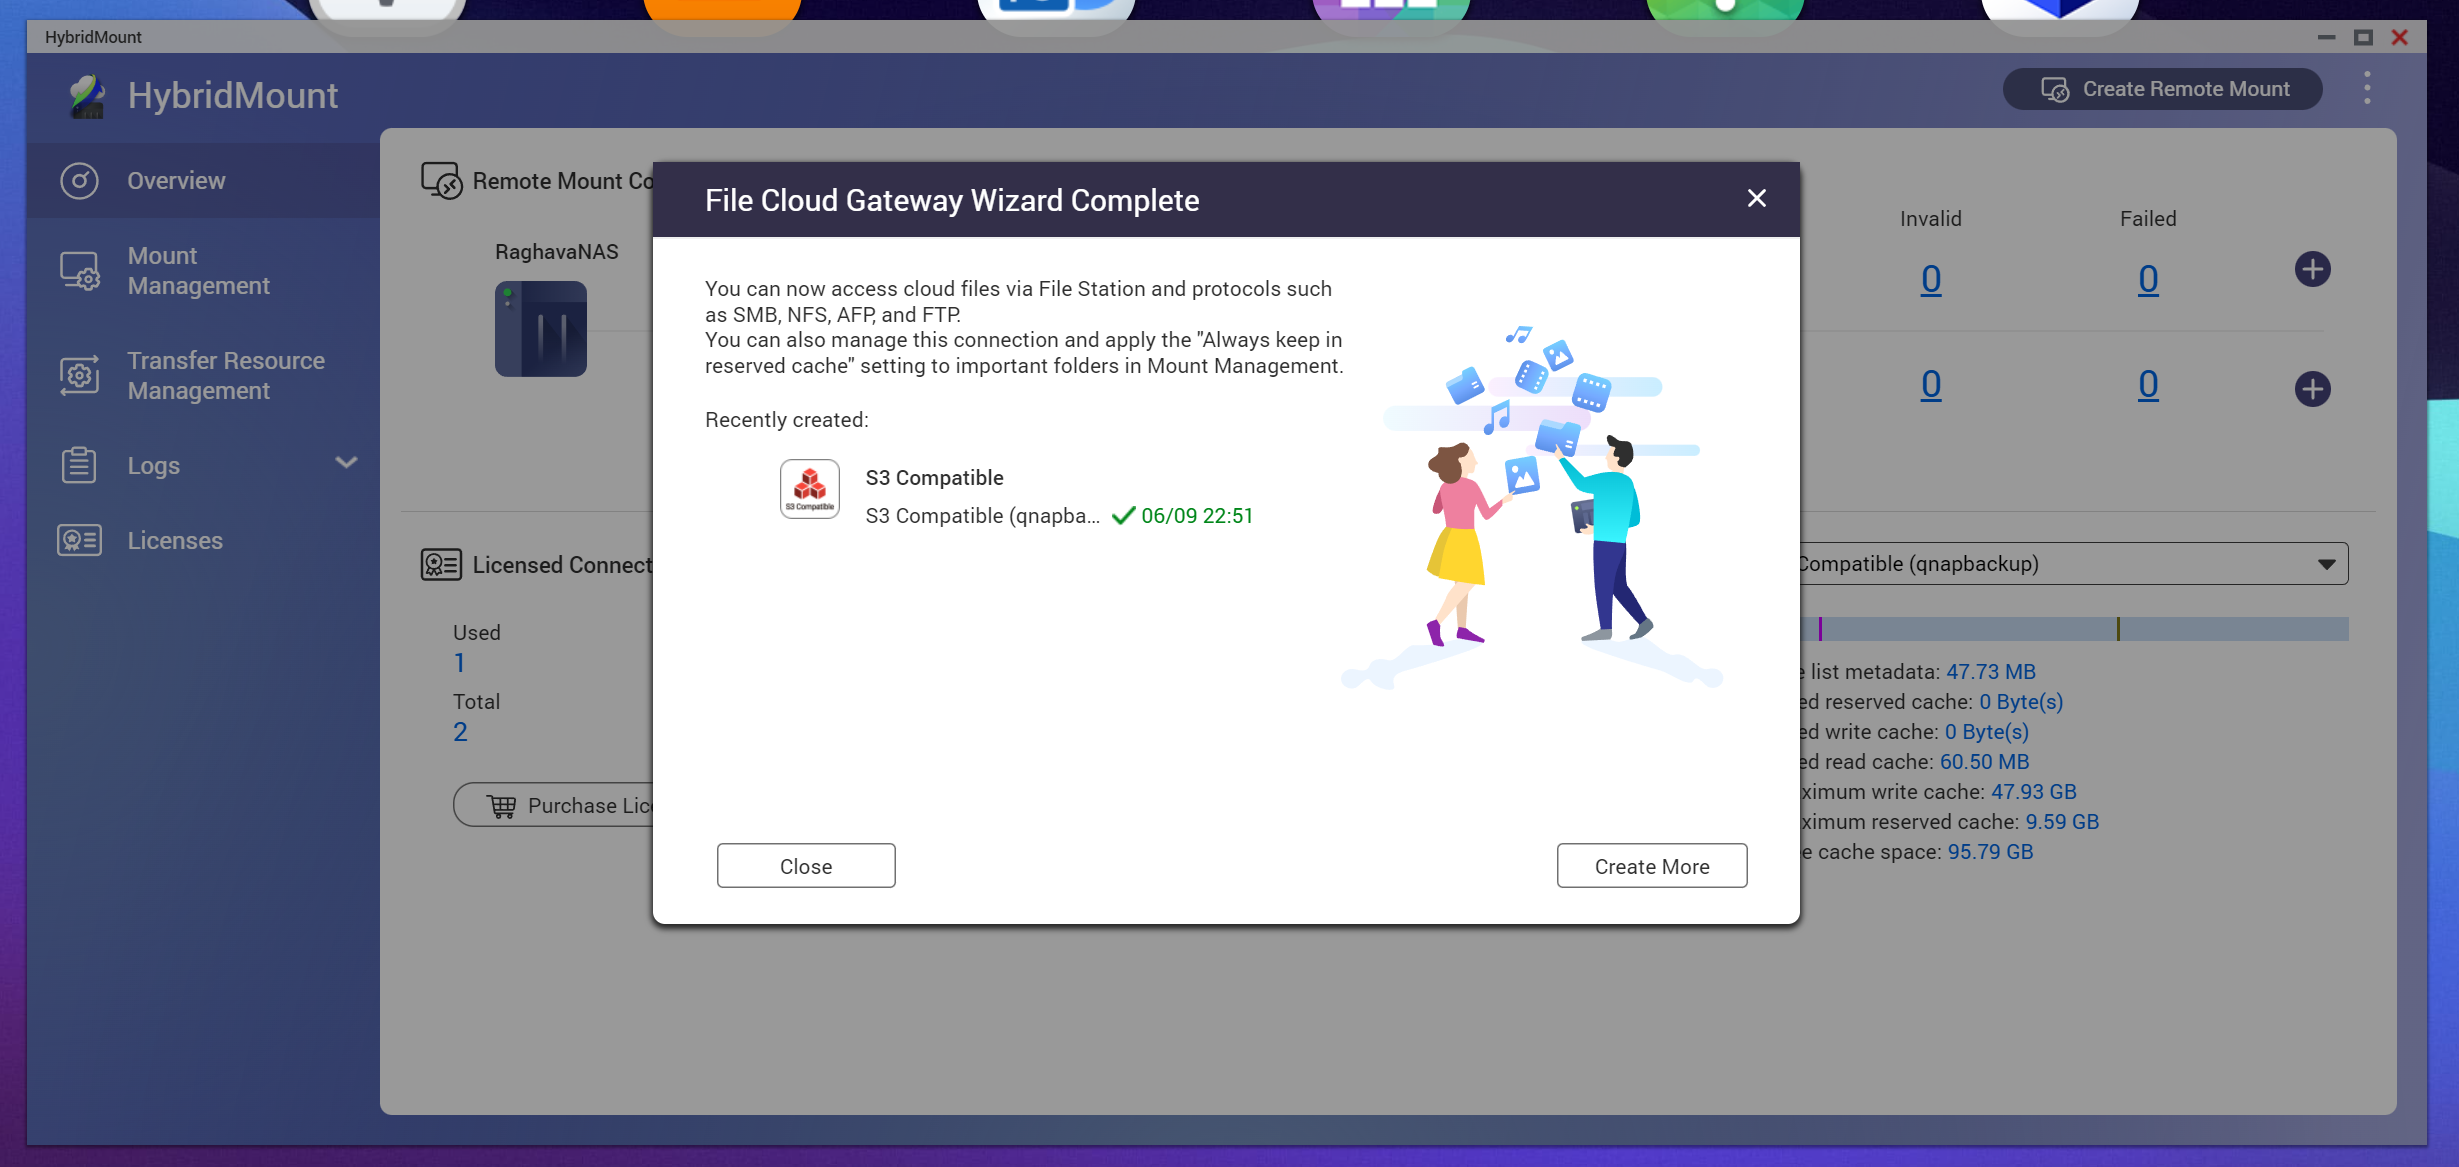
- Once the HybridMount file cloud gateway is created, you can manage your data on IDrive® e2 from QTS File Station or using your computer after mounting the NAS as a network drive.
Note: If you receive an error while configuring S3 Compatible storage in QNAP HBS 3, specify the server address in the format <endpoint>:443 (for example, s3.us-east-1.idrivee2.com:443). This is currently required due to a known issue in QNAP HBS 3, which requires the HTTPS port (443) to be explicitly specified.
Due to this issue, using Signature Version 4 (v4) may result in an "Authentication error. Cannot connect to cloud service."
As a temporary workaround, configure the connection using Signature Version 2 (v2).
If the issue persists, verify the same IDrive E2 credentials using another S3-compatible client (such as AWS CLI or S3 Browser). If the credentials work successfully, please contact QNAP Support for further assistance with the Signature Version 4 compatibility issue.
Note: Data restoration is handled by your specific backup solution provider and is affected by multiple variables that are unique to your environment. For application-related enquiries/support, it is strongly recommended you seek guidance from the technical team of your backup solution provider.